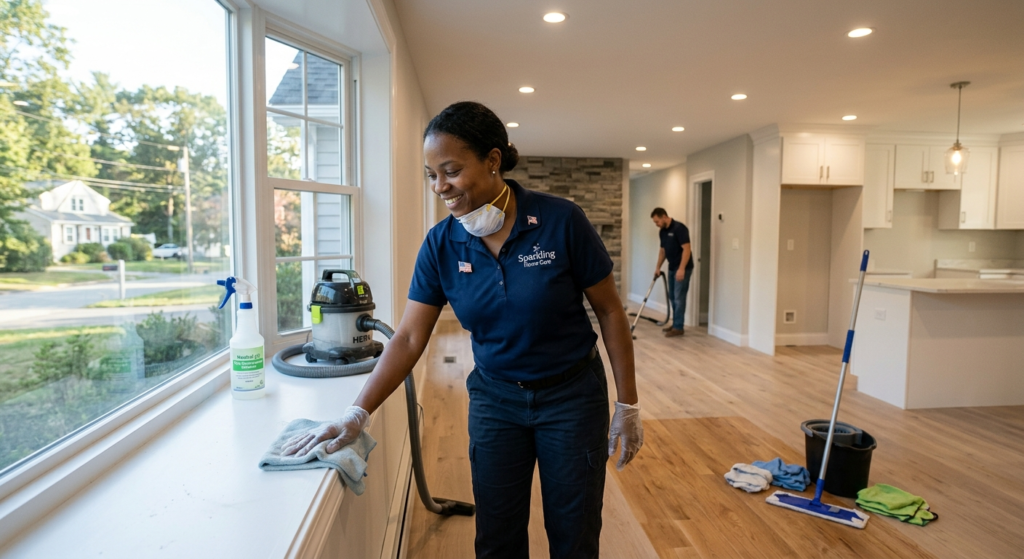
The post-renovation cleaning phase is just as important as the renovation itself. After any construction project or remodel, what’s left behind is a mix of fine dust, paint splatters, construction residue and stubborn dirt that can make your home feel unfinished and even unsafe.
Ignoring this stage – or doing it in a rush – can lead to scratched floors, stained surfaces, lingering odors, allergies and a poor first impression for anyone walking into the space.
In this guide, you’ll learn everything you need to know about post-renovation cleaning, including:
- why it’s different from regular house cleaning;
- the ideal phases of post-renovation cleaning;
- which products and tools to use (and which to avoid);
- when it’s worth hiring a professional cleaning company;
- and best practices to achieve a professional-level result.
1. What Is Post-Renovation Cleaning and Why Is It So Important?
Post-renovation cleaning is a deep cleaning process performed after a construction or remodeling project is finished. It goes far beyond “tidying up” or doing a regular house cleaning.
The goal is to remove construction residue, protect newly installed surfaces and prepare the home so it’s truly safe, comfortable and ready to move in.
1.1. Post-Renovation Cleaning vs. Regular House Cleaning
A regular house cleaning deals with:
- everyday household dust;
- kitchen grease;
- dirt brought in by shoes and daily use.
Post-renovation cleaning, on the other hand, needs to handle:
- very fine cement and drywall dust that spreads everywhere;
- leftover grout, plaster and joint compound;
- paint, varnish and adhesive splatters;
- protective films on glass, metal and fixtures;
- light debris and packaging materials scattered around.
There’s another key difference: many surfaces are brand new or still “curing”, such as porcelain tiles, natural stone, hardwood floors and chrome fixtures. Using harsh products or the wrong tools can permanently damage them.
Treating post-renovation cleaning as just a regular house cleaning is one of the fastest ways to scratch floors, stain tiles and shorten the life of your finishes.
2. Types of Post-Renovation Cleaning: Rough and Final
In real life, post-renovation cleaning is usually divided into two main stages.
2.1. Rough or Initial Post-Renovation Cleaning
This first stage takes place right after the contractors leave, before you start decorating or moving furniture in. It includes:
- removing light debris and leftover materials;
- collecting plastic covers, cardboard and protective paper;
- sweeping and vacuuming the heavy dust;
- scraping off large residue from floors and walls.
The goal is to make the environment “workable” for a more detailed, delicate cleaning.
2.2. Final or Detailed Post-Renovation Cleaning
This is the stage that truly transforms your house into a move-in ready home. It includes:
- detailed cleaning of floors, baseboards and grout;
- wiping doors, frames and trim;
- cleaning windows, glass doors and mirrors;
- sanitizing cabinets, countertops and built-ins;
- removing paint, adhesive and grout haze;
- cleaning light fixtures, switches and outlets.
From this stage on, the space finally starts to look “brand new”. After that, a good regular cleaning routine will keep everything fresh with much less effort.
3. Preparation: What to Do Before You Start Post-Renovation Cleaning
Before jumping into action, a little preparation goes a long way.
3.1. Make Sure the Renovation Is Truly Finished
It sounds obvious, but it’s crucial to check:
- if there are no more tasks that create heavy dust (tile cutting, sanding, drilling);
- if the contractor has clearly confirmed that all major work is done;
- if all trades (painters, carpenters, installers) are out of the space.
Starting post-renovation cleaning while people are still working usually means doing everything twice.
3.2. Gather the Right Tools and Supplies
For an efficient post-renovation cleaning, it’s important to have:
- a good vacuum cleaner, ideally with HEPA filter;
- soft-bristled brooms and sturdy squeegees;
- microfiber cloths (they trap fine dust without leaving lint);
- buckets and spray bottles;
- plastic scrapers (to remove splatters without scratching);
- appropriate cleaners for each surface (we’ll detail this next);
- protective gear: gloves, mask and, if needed, safety glasses.
A basic checklist and some planning will save time, prevent mistakes and make the whole process easier.
4. Post-Renovation Cleaning Products: What to Use and What to Avoid
Choosing the right products is one of the most important decisions in post-renovation cleaning. The wrong product can stain, dull or even permanently damage your new finishes.
4.1. Recommended Products
Here are some product types that tend to work well in post-renovation cleaning:
Neutral pH cleaner
Safe on most floors and surfaces, ideal for general cleaning and maintenance.
Post-construction cleaner
Specialized products designed to remove cement residue, grout haze and heavy construction dirt, while being compatible with many types of tile. Always read the label and follow directions.
Appropriate paint removers
Use only on localized splatters and always test in a small, hidden area first.
Mild degreasers
Useful in kitchens and areas where paint splatters mix with grease and everyday dirt.
4.2. Products to Use With Caution or Avoid
Some products are too aggressive for post-renovation cleaning in residential spaces:
Muriatic acid
Extremely aggressive. It can etch porcelain tiles, damage grout and corrode metals. For most homeowners, the best advice is: avoid it.
Excessive bleach (chlorine)
It can discolor some finishes, weaken grout and damage metal fixtures.
Abrasive scouring powders
They can scratch glass, stainless steel and polished tiles.
Steel wool and abrasive pads
They may cause scratches and release metal particles that can rust and stain surfaces.
Always check what type of floor or finish you have (porcelain, ceramic, natural stone, laminate, vinyl, hardwood) and follow the manufacturer’s cleaning recommendations.
5. Step-by-Step Post-Renovation Cleaning
Here is a general step-by-step guide you can adapt to your specific project and type of home.
5.1. Step 1 – Remove Debris and Large Residue
- Collect leftover tiles, wood pieces, plastic covers and cardboard.
- Separate recyclables whenever possible.
- Use heavy-duty trash bags to avoid tears and extra mess.
This frees up space so you can move around safely and clean more efficiently.
5.2. Step 2 – Remove Heavy Dust
- Use a soft-bristled broom to gently sweep the dust into piles and pick it up with a dustpan.
- Vacuum the entire area, especially corners, baseboards and door tracks.
- Avoid using water at this stage: dust mixed with water turns into hard-to-remove mud.
The goal is to remove as much dust as possible before any wet cleaning.
5.3. Step 3 – Clean Walls, Doors and Trim
- With a lightly damp microfiber cloth and a neutral cleaner, wipe down doors, frames and baseboards.
- For painted walls, use a well-wrung cloth to avoid soaking the paint. Work from top to bottom.
- Gently remove paint or plaster splatters with a plastic scraper, without applying too much pressure.
Be patient—this is where you protect your new paint and finishes from scratches and stains.
5.4. Step 4 – Windows, Glass and Frames
- Vacuum or brush window tracks and sliding door rails.
- Use a small brush or old toothbrush to loosen trapped dust.
- Clean glass surfaces with a glass cleaner or a mild mixture of water and neutral cleaner.
- Use microfiber cloths to avoid streaks and lint.
- Carefully remove any protective films, avoiding sharp tools that might scratch the glass.
Clean windows and glass doors make an immediate visible difference after a renovation.
5.5. Step 5 – Detailed Floor Cleaning
Post-renovation floor cleaning deserves special attention:
- Start with another round of vacuuming or sweeping to remove any remaining dust.
- Prepare buckets with warm water and a neutral cleaner (or a specific post-construction cleaner suitable for your floor).
- Mop the floor with a well-wrung microfiber mop, rinsing frequently so you don’t just spread the dust around.
- For localized stains (paint, grout haze), use an appropriate remover and always test first in a discreet area.
- Avoid excessive water, especially on laminate, vinyl and wood floors, as it can cause warping and damage.
Proper floor care now will protect your investment and keep your home looking new for longer.
5.6. Step 6 – Bathrooms and Kitchen
- Clean toilets, sinks and tubs with a mild cleaner and a soft sponge, removing construction marks and residue.
- Wipe faucets and metal fixtures with a soft cloth, avoiding harsh chemicals that can tarnish or pit the finish.
- For stone countertops (granite, marble, quartz), use cleaners recommended for that specific material and avoid acidic products.
- Check drains, traps and grates, removing construction debris to prevent clogs.
Once bathrooms and kitchen are clean, the whole home starts to feel truly ready to use.
6. Should You Hire a Post-Renovation Cleaning Company?
In many cases, hiring a professional post-renovation cleaning service is a smart decision, especially when:
- the area is large or has many rooms;
- there are lots of delicate finishes (glass, high-end fixtures, natural stone);
- your time is limited;
- you don’t have experience with this type of cleaning.
6.1. Advantages of Hiring Professionals
- Trained teams who know how to handle construction residue.
- Professional equipment (industrial vacuums, specialized cleaners).
- Lower risk of damaging new surfaces.
- Time and energy savings for you and your family.
6.2. What to Check Before Hiring
- Reviews and references from previous clients;
- If the company is properly registered and insured;
- A detailed quote specifying what’s included in the post-renovation cleaning;
- Clear agreements on deadlines and the number of cleaners involved.
Even if you hire a company, understanding the basics of post-renovation cleaning helps you evaluate the quality of the service and maintain the results over time.
7. Main Benefits of a Proper Post-Renovation Cleaning
Investing time and care in post-renovation cleaning brings several concrete benefits:
Comfort from day one
Your home becomes truly livable, without that “never-ending construction site” feeling.
Health and safety
Less cement and drywall dust means fewer allergies, respiratory irritation and accidents.
Protection of materials
Using the right products and tools preserves the look and durability of floors, walls and fixtures.
Higher property value
Whether you plan to sell, rent or live in the home, a spotless post-renovation finish adds value.
Savings in the medium term
Fixing scratches, stains and damage caused by poor cleaning is often more expensive than doing it right from the start.
8. Best Practices to Maintain Post-Renovation Results
After all the effort of post-renovation cleaning, a few simple habits will keep your home looking new longer:
- use doormats and ask guests to wipe or remove shoes;
- regularly dust and mop high-traffic areas;
- avoid overly aggressive products in day-to-day cleaning;
- clean windows and frames periodically to prevent buildup;
- keep a basic cleaning schedule by room.
With a good routine, the heavy work of post-renovation cleaning turns into a starting point for a consistently clean, healthy home.
About the Author
Pedro Neto is a home cleaning and organization enthusiast who helps homeowners transform freshly renovated spaces into truly move‑in ready homes. With practical experience in post‑renovation and deep cleaning, he shares clear, step‑by‑step tips to protect your finishes, improve your family’s comfort and keep every room clean and welcoming on a daily basis.
Disclaimer
The content on this website is for informational purposes only and does not replace professional advice from cleaning, construction, health or safety experts. Before using any product, tool or technique for post‑renovation or house cleaning, always read the manufacturer’s instructions and, when in doubt, consult a qualified professional. The use of any information provided here is the sole responsibility of the reader.