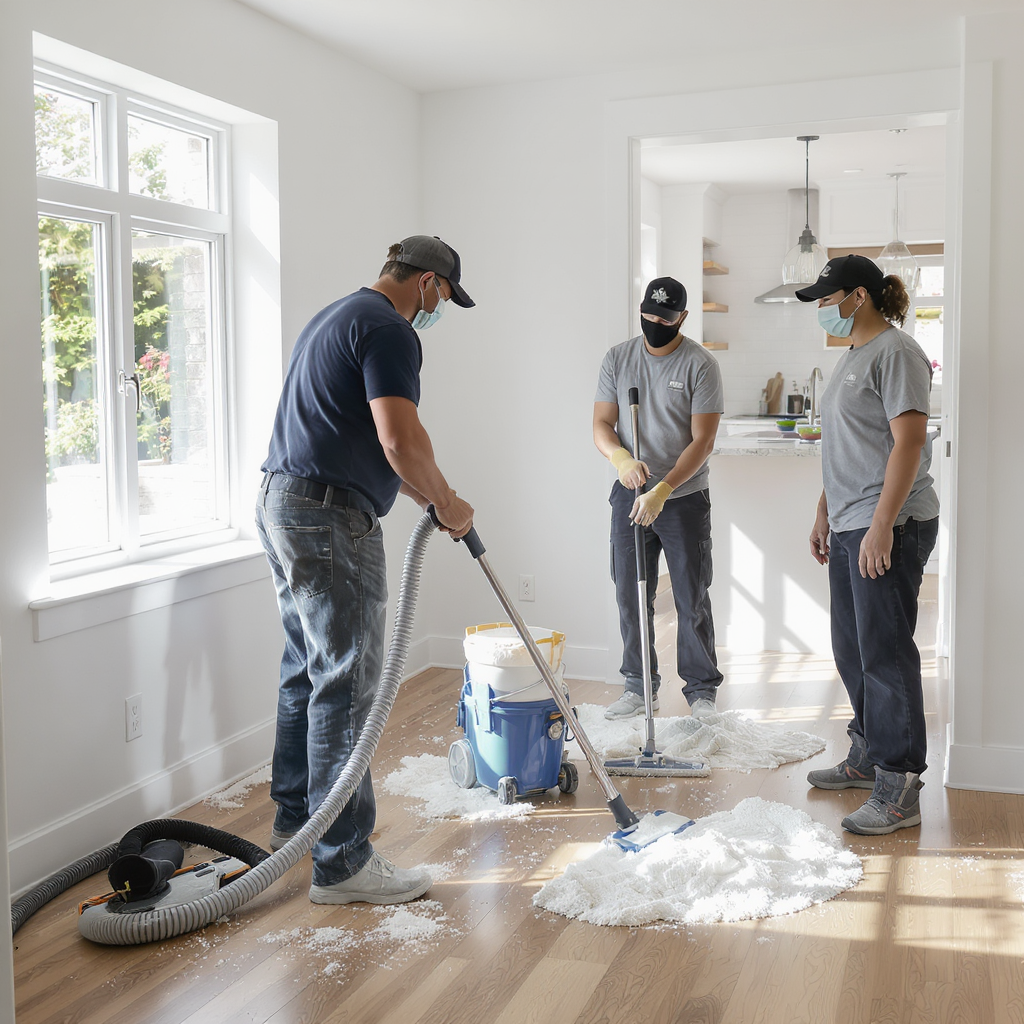
After a renovation, your floors usually face the biggest “battle”: cement dust, grout haze, paint drops, adhesive residue and heavy foot traffic from contractors. If you don’t clean them properly, you can end up with scratches, stains or a dull, cloudy finish that never looks quite right.
The good news is that, with the right products and a careful step-by-step routine, you can safely clean your floors and protect your investment.
In this guide, you’ll learn how to clean floors after renovation for the most common types of flooring: tiles, hardwood, vinyl and laminate. We’ll also show you what to avoid so you don’t accidentally damage your brand-new surfaces.
1. General Rules Before Cleaning Any Floor After Renovation
No matter what type of floor you have, a few basic rules always apply after construction or remodeling.
1.1. Remove loose debris and heavy dust first
- Pick up larger debris (pieces of tile, wood, plastic, packaging).
- Gently sweep with a soft-bristled broom.
- Vacuum with a good filter (ideally HEPA) to capture fine construction dust.
Avoid using water at this stage. When you mix water with cement or drywall dust, it can form a kind of “mud” that’s harder to remove.
1.2. Clean from the least to the most aggressive approach
Always start with:
- neutral cleaners;
- soft cloths;
- non-abrasive tools.
Only move to stronger products or techniques if the gentle approach doesn’t work, and always test in a hidden area first.
1.3. Follow the floor manufacturer’s recommendations
If you still have the product documentation or know the exact type and brand of your floor, check the cleaning instructions. Many warranties can be voided if you use forbidden products (like certain acids or steam).
For a complete overview of post-renovation cleaning beyond the floors, you can also read:
Post-Renovation Cleaning: Complete Guide to Make Your Home Move-In Ready.
2. How to Clean Tile Floors After Renovation
Tile floors (ceramic or porcelain) are common in kitchens, bathrooms and living areas. They resist water and heavy traffic, but they can still be stained or dulled by harsh products.
2.1. Step-by-step cleaning for tile floors
- Dry cleaning first
- Remove loose debris with a broom or vacuum.
- Pay attention to corners and grout lines where dust accumulates.
- Prepare a mild cleaning solution
- Use warm water + a neutral pH cleaner suitable for tiles.
- Avoid mixing random chemicals or using very strong products right away.
- Mop the floor
- Use a microfiber mop, well wrung, and work in small sections.
- Rinse the mop often and change the water when it becomes cloudy.
- Treat grout haze and cement residue
- If you see a cloudy film that doesn’t go away, it might be grout haze.
- Use a specific post-construction tile cleaner recommended for ceramic or porcelain.
- Follow the instructions carefully and test in a discreet spot first.
- Rinse well
- After using any special cleaner, rinse the floor with clean water to remove residue.
- Dry the surface
- Allow the floor to air dry or use a clean, dry mop to speed things up and avoid water spots.
2.2. What to avoid on tile floors
- Strong acids like muriatic acid (they can damage grout and even porcelain).
- Abrasive powders and steel wool that can scratch tiles and leave metal particles.
- Mixing bleach with other chemicals (dangerous and unnecessary in most cases).
3. How to Clean Hardwood Floors After Renovation
Hardwood floors add warmth and elegance to a home, but they require special care, especially after renovation.
3.1. Step-by-step cleaning for hardwood floors
- Remove dust gently
- Use a vacuum with a soft brush attachment designed for hard floors.
- Avoid vacuum heads with rotating brushes that can scratch the surface.
- Dry mop or dust
- Use a dry microfiber mop to collect remaining dust.
- Move in the direction of the wood grain when possible.
- Damp cleaning (not wet)
- Prepare a bucket with water and a wood-safe cleaner recommended by the manufacturer or suitable for sealed hardwood floors.
- Lightly dampen a microfiber mop and wring it very well.
- Mop the floor without leaving puddles or excess moisture.
- Spot cleaning paint and residue
- For small paint drops, use a plastic scraper gently, keeping it almost flat to the floor.
- If needed, use a wood-safe cleaner on a cloth to soften the residue before scraping.
- Never use metal spatulas or abrasive pads on hardwood.
- Quick drying
- After mopping, dry the floor with a clean, dry microfiber cloth or allow it to air dry quickly with good ventilation.
3.2. What to avoid on hardwood floors
- Excessive water or very wet mops (they can warp or swell the wood).
- Steam mops, unless the manufacturer explicitly says they are safe.
- Harsh chemicals, ammonia, bleach or abrasive cleaners.
- Waxing or polishing without checking if your floor finish is compatible.
4. How to Clean Vinyl Floors After Renovation
Vinyl floors are popular because they are practical, water-resistant and often more affordable, but they also need proper care to stay beautiful after construction work.
4.1. Step-by-step cleaning for vinyl floors
- Dry cleaning first
- Sweep or vacuum to remove dust and small debris.
- Make sure the vacuum is set to “hard floor” mode.
- Mild cleaning solution
- Mix warm water with a neutral cleaner recommended for vinyl floors.
- Avoid very strong degreasers or solvents.
- Mop the floor
- Use a microfiber mop, well wrung.
- Clean in sections, rinsing the mop often to avoid spreading dust.
- Remove stuck-on residue
- For paint drops or adhesive, start with a plastic scraper and gentle pressure.
- If needed, use a small amount of a vinyl-safe cleaner on a cloth and rub carefully.
- Always test in a small hidden corner first.
- Final rinse (if needed)
- If the floor feels sticky or cloudy, do a light pass with clean water only and dry with a clean mop.
4.2. What to avoid on vinyl floors
- Abrasive pads or scrubbers that can scratch the surface.
- Strong solvents or acetone that can damage or discolor vinyl.
- Waxes or polishes that are not specifically indicated for vinyl flooring.
5. How to Clean Laminate Floors After Renovation
Laminate floors imitate wood and other materials, but their surface is different and can be sensitive to water and aggressive products.
5.1. Step-by-step cleaning for laminate floors
- Vacuum or sweep
- Remove construction dust with a soft broom or vacuum for hard floors.
- Avoid stiff bristles or rotating brushes that might scratch.
- Dry dusting
- Use a dry microfiber mop to collect any leftover dust or fine particles.
- Light damp mopping
- Prepare a solution with water and a laminate-safe cleaner.
- Lightly dampen the mop and wring it thoroughly.
- Clean the floor without soaking it, working in small sections.
- Spot treatment
- For local stains or paint, use a damp cloth with a laminate-safe cleaner.
- Never pour liquid directly onto the laminate floor.
- Dry immediately
- Use a dry cloth or mop to remove any excess moisture right away.
5.2. What to avoid on laminate floors
- Excess water, which can cause the boards to swell or warp.
- Steam cleaners, unless the manufacturer says they are safe.
- Abrasive tools or powders.
- Wax or polish (laminate floors usually should not be waxed).
6. How to Deal With Persistent Stains and Residues
Sometimes, even after careful cleaning, you’ll still see:
- stubborn grout haze on tiles;
- paint or varnish drops;
- adhesive marks;
- mysterious cloudy patches.
Here are some general tips:
- Always start with the least aggressive option, like warm water and a neutral cleaner.
- Use plastic scrapers, not metal ones, to avoid scratching.
- For tiles, consider a specialized post-construction cleaner compatible with your floor type.
- For wood, vinyl and laminate, stick to manufacturer-approved products.
If you’re unsure, it may be safer to contact a professional post-renovation cleaning service or the flooring manufacturer before using a strong product.
7. Common Mistakes When Cleaning Floors After Renovation
Avoid these errors to protect your floors:
- Using muriatic acid or very strong acids on tile floors.
- Cleaning hardwood, laminate or vinyl with a soaking wet mop.
- Using steel wool or abrasive pads on any delicate surface.
- Mixing different chemicals without knowing how they react.
- Skipping the vacuuming step and going straight to wet cleaning.
Small mistakes at this stage can lead to permanent damage that is costly to repair.
8. When to Call a Professional for Floor Cleaning After Renovation
In some situations, hiring a professional cleaning company is the smartest decision:
- large areas with heavy construction residue;
- natural stone floors (marble, limestone, travertine) that can be very sensitive;
- expensive hardwood floors with special finishes;
- lack of time or physical conditions to handle deep cleaning.
A qualified professional has experience, specific products and the right equipment to treat each type of floor safely.
9. Maintaining Floors After the First Post-Renovation Cleaning
Once you’ve brought your floors back to life after renovation, a few habits will help keep them looking great:
- use doormats at entrances to reduce dirt and sand;
- sweep or vacuum regularly to prevent scratches caused by grit;
- clean spills immediately;
- use felt pads under furniture legs;
- follow a gentle cleaning routine with neutral or manufacturer-recommended products.
Taking care of your floors from the beginning protects your investment and keeps your renovated home beautiful for many years.
About the Author
About the Author
Pedro Neto is a home cleaning and organization enthusiast who helps homeowners transform freshly renovated spaces into truly move‑in ready homes. With practical experience in post‑renovation and deep cleaning, he shares clear, step‑by‑step tips to protect your finishes, improve your family’s comfort and keep every room clean and welcoming on a daily basis.
Disclaimer
Disclaimer
The content on this website is for informational purposes only and does not replace professional advice from cleaning, construction, health or safety experts. Before using any product, tool or technique for post‑renovation or house cleaning, always read the manufacturer’s instructions and, when in doubt, consult a qualified professional. The use of any information provided here is the sole responsibility of the reader.