A freshly renovated kitchen is one of the best upgrades you can give your home. But before you can really enjoy cooking and entertaining, you have to deal with the less glamorous part: post‑renovation cleaning.
Construction dust, grout haze, paint splatters and adhesive residue can hide on cabinets, countertops, appliances and floors. If you clean them the wrong way, you risk scratching surfaces or damaging the finishes you just invested in.
In this step‑by‑step guide, you’ll learn how to clean a kitchen after renovation safely and effectively — from upper cabinets to floors — and how this fits into your overall post‑renovation cleaning plan and weekly routine.
1. Start with Safety and a Simple Plan
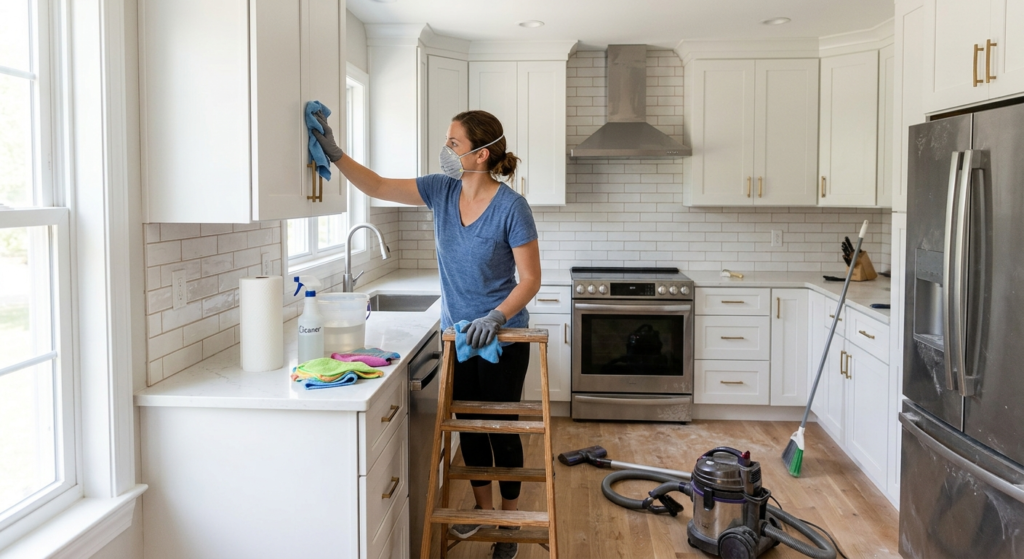
Post‑renovation kitchen cleaning is heavier than normal cleaning, so it’s important to protect yourself and work in a logical order.
Before you start:
- open windows and doors for good ventilation;
- wear a mask to avoid breathing fine dust;
- use gloves to protect your skin;
- keep children, pets and people with allergies out of the work area.
If you’re cleaning more than one room after your remodel, it helps to follow a general post‑renovation strategy like this:
Post-Renovation Cleaning: Complete Guide to Make Your Home Move-In Ready.
Plan your order:
Always work from top to bottom and from cleanest to dirtiest areas. In a kitchen, that usually means:
- ceilings, lights and upper cabinets;
- walls and backsplash;
- cabinets and drawers (inside and outside);
- countertops and sink;
- appliances;
- floors.
2. The Best Tools and Products for a Newly Renovated Kitchen
Using the right tools and products is essential to avoid scratching or staining new surfaces.
Useful tools:
- vacuum with brush attachment;
- soft broom and dustpan;
- microfiber cloths (separate colors for different areas);
- microfiber mop;
- soft, non‑abrasive sponges;
- soft‑bristled brush for corners and grout;
- plastic scraper (for paint or adhesive residue).
Product types to use (always check labels and surface compatibility):
- neutral pH all‑purpose cleaner;
- dish soap (mild, good for many surfaces);
- dedicated countertop cleaner (for quartz, granite, marble, etc.);
- glass cleaner (for glass doors, oven windows and stainless steel if allowed);
- tile and grout cleaner safe for kitchens;
- gentle degreaser (for range hood and backsplash when necessary).
For help choosing safe products that won’t damage your new finishes, see:
Best Products for Post-Construction Cleaning (Without Damaging Surfaces).
3. Step 1 – Remove Construction Dust from Top to Bottom
Fine dust is one of the biggest challenges after a kitchen renovation. It spreads everywhere and keeps reappearing if you don’t remove it correctly.
3.1. Ceiling, lights and vents
- Use a dry microfiber mop or duster with an extension handle to gently remove dust from the ceiling.
- Carefully dust light fixtures, recessed lights and air vents.
- If needed, wipe with a slightly damp microfiber cloth afterward.
3.2. Upper cabinets and top surfaces
- Vacuum or dust the tops of cabinets and high shelves first.
- Wipe them with a slightly damp microfiber cloth and a neutral cleaner.
- Work slowly to avoid pulling dust down onto already‑cleaned areas.
If you feel that dust keeps coming back in other rooms too, these tips will help:
How to Remove Construction Dust from Your Home Safely.
4. Step 2 – Clean Cabinet Exteriors and Interiors
Cabinets are often the star of a new kitchen — and also a magnet for dust and fingerprints.
4.1. Cabinet doors and exteriors
- Start with a dry microfiber cloth to remove loose dust.
- Then clean with a slightly damp cloth and a gentle cleaner suitable for your cabinet finish (painted wood, laminate, natural wood, etc.).
- Pay attention to handles, edges and trim where dust and residue accumulate.
- Dry with a soft cloth to avoid water streaks.
Avoid abrasive pads or harsh chemicals that can dull the finish or remove paint.
4.2. Inside cabinets and drawers
- Empty each cabinet or drawer (if you already stored items).
- Vacuum or wipe with a dry microfiber cloth to remove dust and sawdust.
- Follow with a lightly damp cloth with a neutral cleaner.
- Dry completely before putting items back to prevent moisture damage or odors.
Detailed cabinet cleaning is a key part of your overall post‑renovation plan. For a complete room‑by‑room checklist that includes the kitchen, see:
Post-Renovation Cleaning Checklist: Room-by-Room Guide.
5. Step 3 – Clean Backsplash, Walls and Grout
Backsplash tiles and walls near the countertop often collect grout haze, dust and splatters.
5.1. Dry cleaning first
- Gently dust or vacuum the backsplash and nearby walls to remove loose particles.
- Focus on grout lines, corners and behind the range.
5.2. Washing backsplash tiles
- Prepare a bucket with warm water and a tile‑safe neutral cleaner.
- Wipe tiles with a soft sponge or microfiber cloth.
- Rinse with clean water if the product requires it.
- Dry with a soft cloth to avoid water spots.
If you notice a cloudy film on newly installed tiles, it may be grout haze. In that case:
- Use a grout haze remover specifically made for your tile type (not for natural stone unless the label says it’s safe).
- Follow instructions carefully, do a small test area first and always rinse thoroughly.
For more tips on floors and tiles post‑renovation (including grout haze), see:
How to Clean Floors After Renovation (Tiles, Wood, Vinyl and Laminate).
6. Step 4 – Protect and Clean New Countertops and Sink
Countertops are one of the most sensitive and visible parts of a new kitchen. They deserve special care.
6.1. Identify your countertop material
Different materials need different products:
- quartz (engineered stone);
- granite or marble;
- laminate;
- solid surface (like Corian);
- butcher block wood.
Always follow the manufacturer’s recommendations for your specific countertop.
6.2. Basic post‑renovation countertop cleaning
- Remove dust and debris with a dry microfiber cloth or soft brush.
- Clean with a mild cleaner approved for your surface (often a mix of warm water and a small amount of dish soap is safe).
- Avoid harsh acids, bleach or abrasive powders unless the manufacturer clearly allows them.
- Rinse with a damp cloth and dry thoroughly to avoid streaks or water marks.
If some adhesive or paint splatters remain:
- Use a plastic scraper at a very low angle and gentle pressure.
- Never use metal scrapers on delicate surfaces like quartz, marble or laminate.
6.3. Sink and faucet
- Rinse the sink to remove loose dust.
- Clean with a non‑abrasive cleaner suitable for stainless steel, composite or ceramic, depending on your sink.
- Wipe faucets and handles with a soft cloth and mild cleaner safe for the finish (chrome, brushed nickel, matte black, etc.).
- Dry to avoid water spots and keep metal finishes looking new.
If you’re unsure which cleaners are safe for each kitchen surface, this guide can help you choose:
Best Products for Post-Construction Cleaning (Without Damaging Surfaces).
7. Step 5 – Clean Appliances Inside and Out
New or recently reinstalled appliances often collect dust and fingerprints during renovation.
7.1. Refrigerator
- Gently pull the fridge away from the wall if possible (and safe).
- Vacuum dust from behind and underneath.
- Clean the exterior with a cleaner appropriate for the finish (stainless steel, white, black, etc.).
- Wipe handles carefully; they accumulate a lot of dust and dirt.
- Inside, clean shelves and drawers with warm water and mild dish soap, then dry.
7.2. Oven and range
- Wipe the cooktop with a cleaner suitable for your type (gas, electric, glass).
- Clean the oven door (inside and outside) with a non‑abrasive cleaner.
- Remove construction dust from knobs and control panels with a slightly damp microfiber cloth (avoid soaking electronic areas).
7.3. Dishwasher and microwave
- Wipe exteriors with a soft cloth and mild cleaner.
- Inside the dishwasher, check and clean the filter, and run a cleaning cycle if recommended by the manufacturer.
- For microwaves, clean the interior with warm water and mild dish soap; avoid harsh chemicals.
8. Step 6 – Finish with a Thorough Floor Cleaning
Kitchen floors usually get a heavy load of renovation dust, grout residue and footprints.
- First sweep or vacuum
- Remove as much loose dust and debris as possible.
- Use a soft brush attachment for edges and under cabinets.
- Wet cleaning according to floor type
- Use a cleaner specifically designed for your floor (tile, vinyl, laminate, wood, etc.).
- Avoid soaking wood or laminate floors with water; use a damp (not wet) microfiber mop.
- Change the water as soon as it looks dirty to avoid spreading residue.
- Check for haze or film
- After the floor dries, inspect under good light.
- If you see a whitish film, repeat a light cleaning or use a floor‑safe post‑construction cleaner.
For a complete guide focused on floors only, review:
How to Clean Floors After Renovation (Tiles, Wood, Vinyl and Laminate).
9. Common Mistakes When Cleaning a Kitchen After Renovation
Avoid these mistakes to protect your new kitchen:
- using harsh chemicals (like strong acids or undiluted bleach) on countertops or grout;
- scrubbing cabinets, glass or appliances with abrasive pads;
- mixing cleaning products (dangerous and unnecessary);
- starting with wet cleaning before removing dry dust;
- cleaning only once and expecting dust to disappear immediately — after a big renovation, some dust may resettle for a few days.
For more advice on what not to do after a remodel, you can check:
10 Post-Renovation Cleaning Mistakes to Avoid (and What to Do Instead)
(quando esse artigo estiver publicado, esse link vai reforçar ainda mais seu cluster de pós‑obra).
10. How to Keep Your Renovated Kitchen Clean with a Weekly Routine
After the initial deep clean, the secret to keeping your new kitchen beautiful is a simple weekly cleaning routine.
A basic weekly kitchen routine includes:
- clearing and wiping countertops;
- cleaning the sink and faucet;
- wiping the stovetop and backsplash;
- cleaning the exterior of appliances;
- sweeping and mopping the floor;
- taking out the trash and recycling regularly.
For a complete home‑wide plan that includes the kitchen, see:
Weekly Cleaning Routine: Simple Checklist to Keep Your Home Always Fresh.
If sua casa inteira passou por reforma, combine esse cuidado da cozinha com o plano geral:
Post-Renovation Cleaning: Complete Guide to Make Your Home Move-In Ready.
By following this step‑by‑step process, you’ll remove construction dust and residue safely, protect your new cabinets, countertops and appliances and enjoy a kitchen that finally looks and feels move‑in ready.
About the Author
About the Author
Pedro Neto is a home cleaning and organization enthusiast who helps homeowners transform freshly renovated spaces into truly move‑in ready homes. With practical experience in post‑renovation and deep cleaning, he shares clear, step‑by‑step tips to protect your finishes, improve your family’s comfort and keep every room clean and welcoming on a daily basis.
Disclaimer
Disclaimer
The content on this website is for informational purposes only and does not replace professional advice from cleaning, construction, health or safety experts. Before using any product, tool or technique for post‑renovation or house cleaning, always read the manufacturer’s instructions and, when in doubt, consult a qualified professional. The use of any information provided here is the sole responsibility of the reader.